Blog Post Checklist (Step By Step Guide To Writing A Post)
Want to write killer blog posts that your readers will love? Use this free printable blog post checklist to create your posts quickly and easily.
Writing a blog post is easy but it involves more than just writing. You need to consider SEO, social media promotions and accessibility.
Your key words, images and headlines are all just as important as the body of your text and often take more time too!
In this post we will go through a checklist for writing your blog posts well every time and as quickly as possible.
At the bottom of the post is a downloadable checklist you can print out.
This post may contain affiliate links. Please read my Disclosure for more information
RELATED POSTS
Why Your Blog Needs A Copyright/Sharing policy
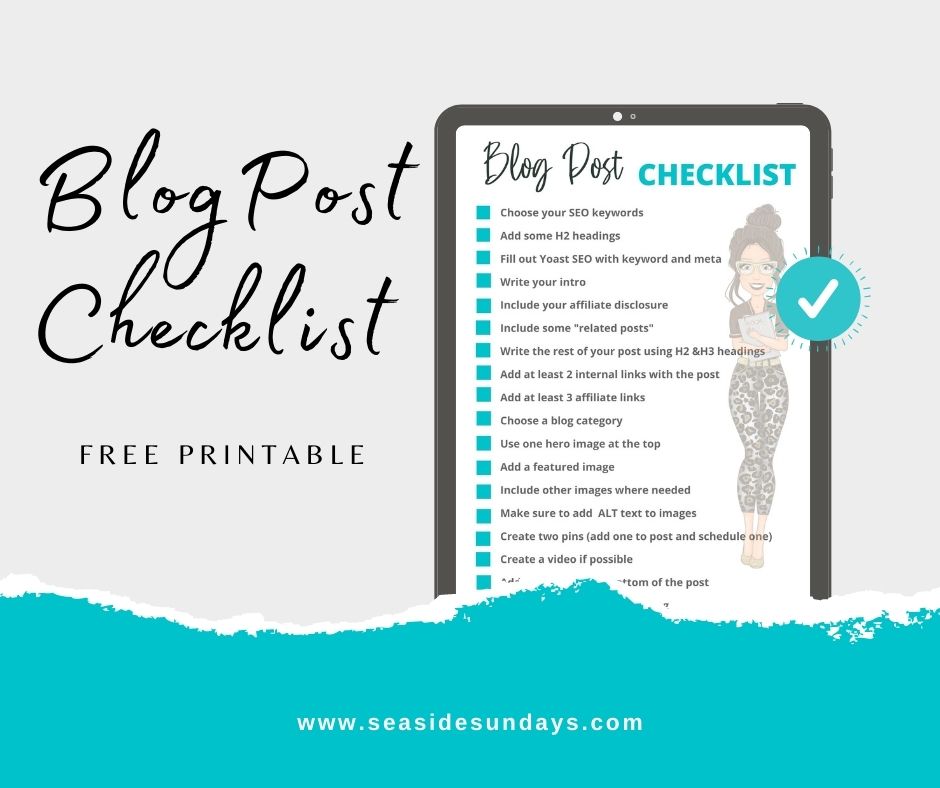
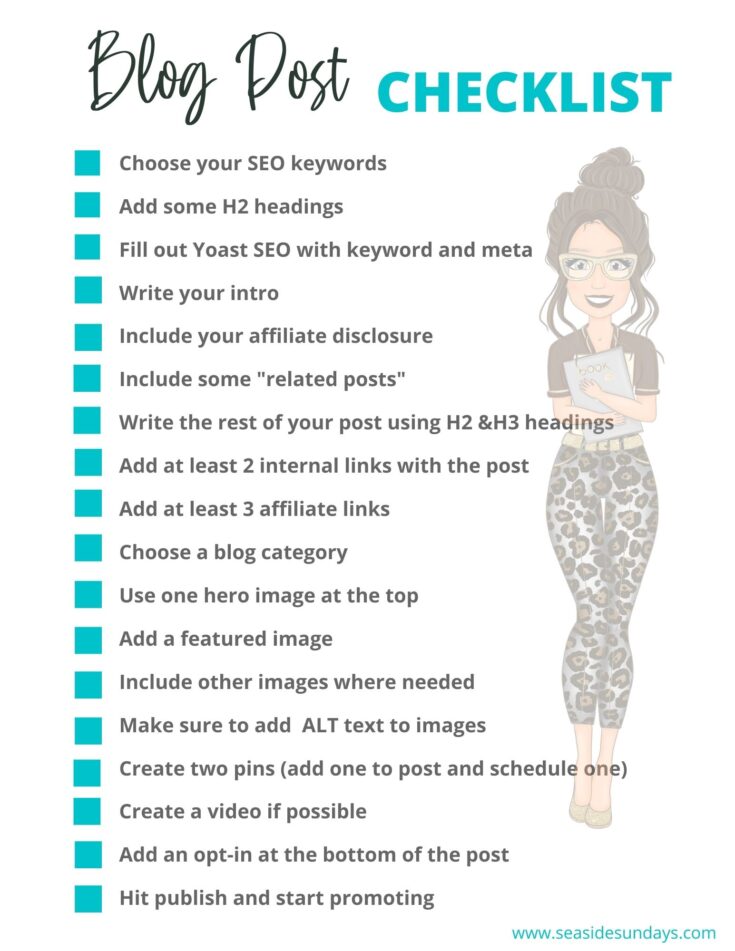
The Ultimate Blog Post Checklist
I actually created this blog post checklist for my husband. He has started writing blog posts for me but he kept forgetting to fill out the alt text or add a featured image.
According to him, all the little bits take too much time and are hard to remember. So I made him this list.
Without further ado, here is the blog post checklist.
Use it to make sure you have completed all the necessary steps every time you write an article for your website.
1. Choose your SEO keywords
This may be the most important part of your post writing so don’t rush through it. Choose the topic of your post then look for a keyword to target that you think you can rank for.
There are lots of keyword tools out there, personally I use RankIQ to find good keywords.
It actually shows you how easy the keyword is to rank for which makes this step super easy.
![]()
For more information on how RankIQ works, you can read my RankIQ Review.
2. Add some H2 headings
Once you have found your target keyword, do a search on Google for it and look at what other questions people ask about that topic.
Those can form the basis of your H2 headings and can start you off with your post.
Next, decide what other headings would make sense to add to your post.
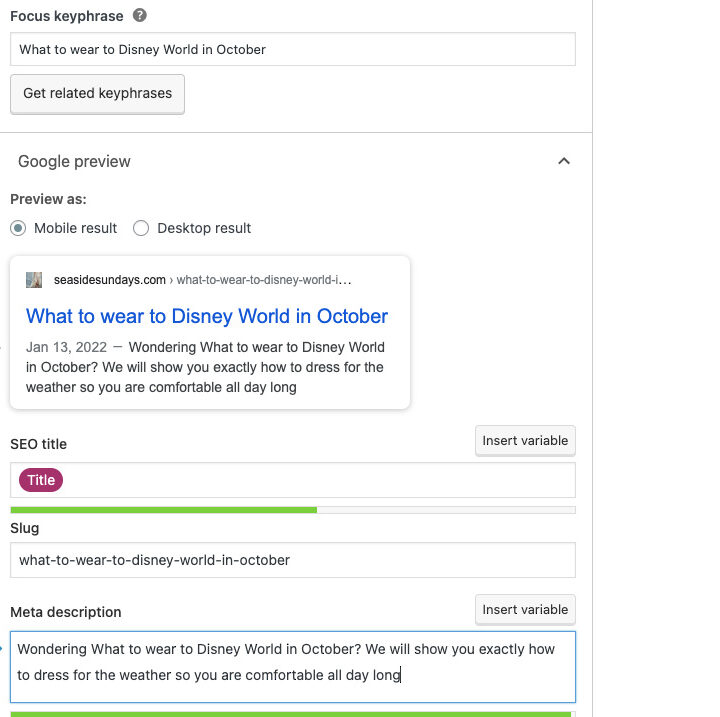
For example, let’s imagine we are writing a post on “What to wear to Disney World in October”
You might want to include the following H2s:
The best shoes to wear to Disney World in October
Average Rainfall at Disney in October
Average Temperature at Disney In October
5 Must-haves for your Purse when visiting Disney
You get the idea!
3. Fill out Yoast SEO with keyword and Meta Description
Put your keyword into the SEO box in Yoast and fill out the Meta description – make sure to include your keyword.
This is a good time to also choose your slug (the name of your post in the google bar).
4. Write your intro
Make sure to include your keyword in your intro and add another 70-100 words to tell your reader what you are going to write about.
I use Jarvis for writing my blog intros most of the time because it saves me time.
I am on the lowest plan and I use it for intros and conclusions only just to get me started.
<h3″>5. Include your affiliate disclosure
I always include my affiliate disclosure after my first paragraph and below my main photo. If you put it at the top of your post, that is fine too.
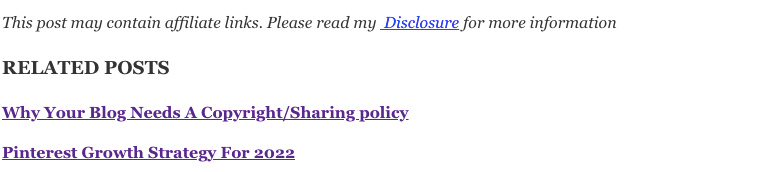
6. Include some “related posts”
Make sure to add some related articles that you reader might like. This helps you get more views to your blog and also is good for SEO.
7. Write the rest of your post using H2 &H3 headings
Now fill out the rest of your blog post using the H2 headers you already decided on. Aim for around 150-250 words per heading.
Make sure to use short sentences and nice spaces so your post doesn’t look like a wall of text.
8. Add at least 2 internal links with the post
Within your post, you want to naturally try and link to other related posts as that will really help your blog traffic.
See what I did there?
9. Add at least 3 affiliate links
Almost every post can give you an opportunity for some affiliate sales.
Aim for at least 3 links to Amazon or another affiliate network.
Make sure to mark your link as “sponsored” or “nofollow”
10. Choose a blog category
Don’t forget to check off a category for your post so it shows up on your menus and homepage.
11. Use one hero image at the top
I like to use one big horizontal image at the top of my posts. I used to use a Pinterest pin but now I add those at the bottom.
The horizontal image can double as your Facebook image too.
I make mine 800 x 200 px but your size will depend on your WordPress theme.
12. Add a featured image
Don’t forget to include a featured image for your post. This is the one that shows up as a thumbnail if you use a related posts plugin.
13. Include other images where needed
Depending on your post, you might want to include more images throughout your post.
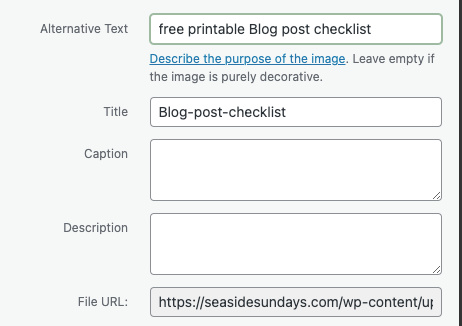
14. Make sure to add ALT text to images
When uploading your images to your post, make sure to complete the Alt text box.
Alternative text is a text for non-text content (video, images) in your blog posts.
If the image doesn’t render, your alternative text is what is show plus it is very important to make sure your site is accessible to everyone.
Your alt text should describe exactly what your photo shows for example ” This is a photo of three chocolate chip cookies on a red plate”.
15. Create two pins (add one to post and schedule one)
While I’m working on a post, I always make 2 pins as it is easily than going in later to make them.
I put one pin at the bottom of my post and I pin it as soon as my post is published.
The second one, I schedule either via Tailwind or the Pinterest scheduler for about 2-3 weeks later.
16. Create a video if possible
If your subject lends itself to it, adding a video to your post can be a great way to boost your Google rankings.
17. Add an opt-in at the bottom of the post
Always make sure to add an optin at the bottom of your post to capture email addresses and build your list.
If you use kit like me, this is already done for you as they let you choose a default optin that is automatically shown unless you switch it.
Convertkit has a free plan you can use for up to 10000 subscribers which makes it great for beginners.
18. Publish and promote your post
Once you are done all the steps, hit publish and then share your images to social media and start promoting
I also often submit my URL to Google Search Console but you don’t have to do this.
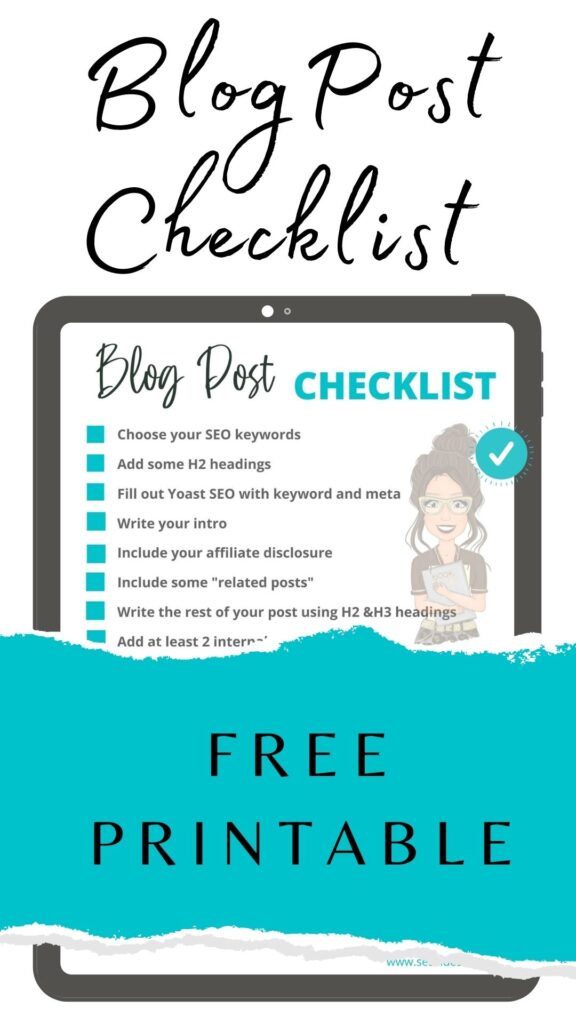
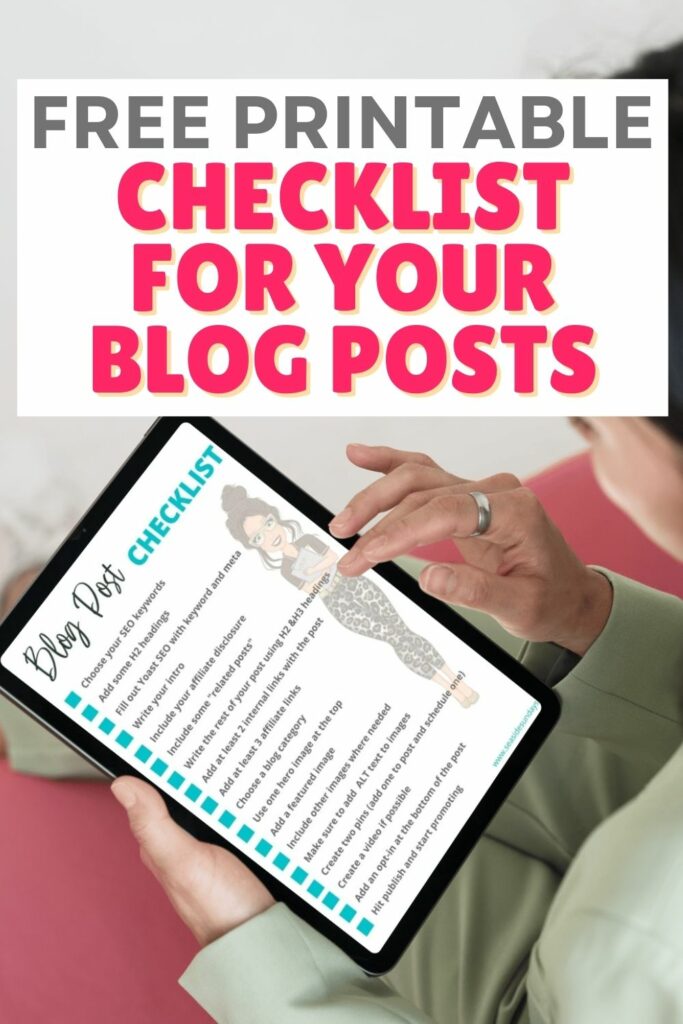
Free Downloadable Blog Post Checklist
To download your free checklist, just click the image below and download it.
I recommend laminating it so you can reuse it for every blog post.
Download your blog check list by clicking the image above or downloading it here.
More Blogging Tips
Get Traffic To Your Blog For The Holidays (Free Printable)
How To Find The Best Pinterest Group Boards For Your Blog
How To Make Money With Affiliate Links On Pinterest